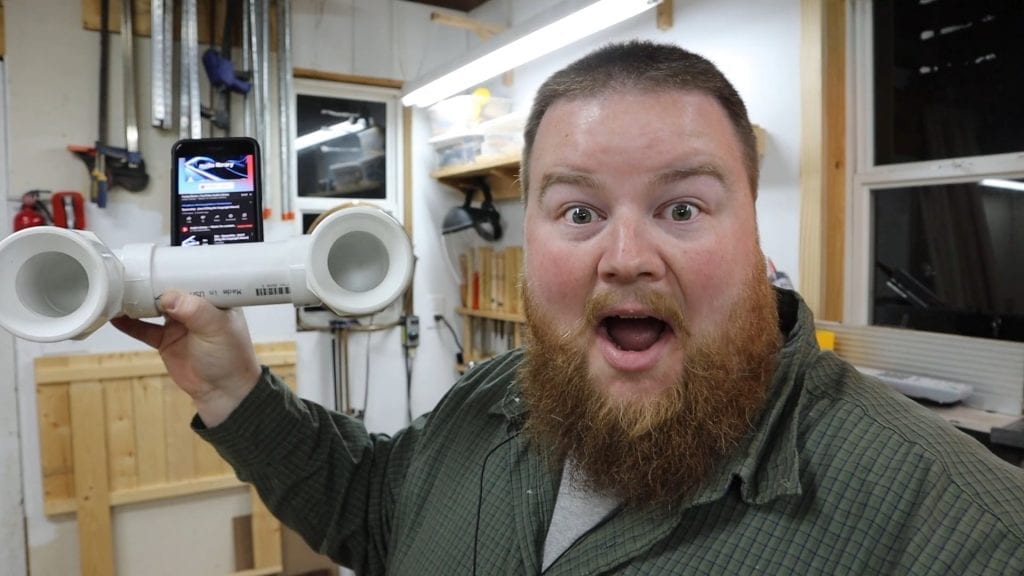

PVC Acoustic Phone Amplifier
This acoustic phone amplifier is easy to build with basic tools and materials and only takes about 20 minutes from start to finish. This project is great for gift ideas or even for someone looking to bring in some income on the side making and selling these! The PVC pipe is readily available and easily painted or customized to suit anyone’s taste!
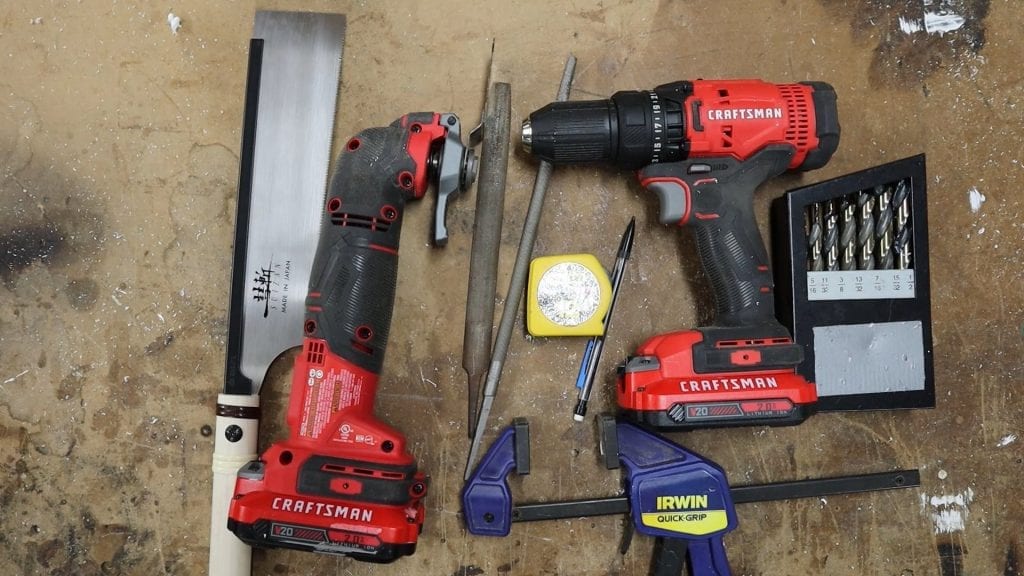
Tools Needed
You only need a few basic tools to make this acoustic phone amplifier. Below is a comprehensive list of all the tools you may need, with optional tools listed. These all link to recommended tools on Amazon’s website. You can also view the full list on Amazon.com if you would like.
- Tape Measure – for measuring the phone and pipes to cut
- Pencil – for marking lines to cut
- Hand Saw or Oscillating Cutoff Saw – for cutting the pipe and the slot for the phone
- Cordless Drill and Drill Bits – for drilling the pilot holes for the phone slot
- File Set or Sandpaper – for smoothing the slot and any jagged edges of the pipe
- Clamp or Vice – for holding the pipe as you make this project
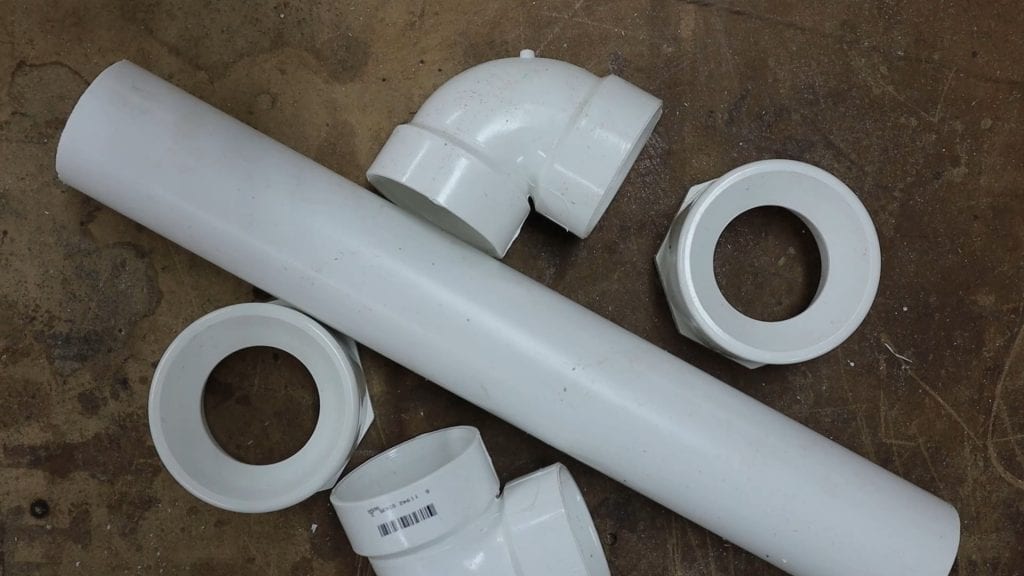
Material List
This phone amplifier project needs only a few materials to complete. While most can be sourced locally, the below list will also link to the materials on Amazon’s website. You can also view the full list on Amazon.com if you would like.
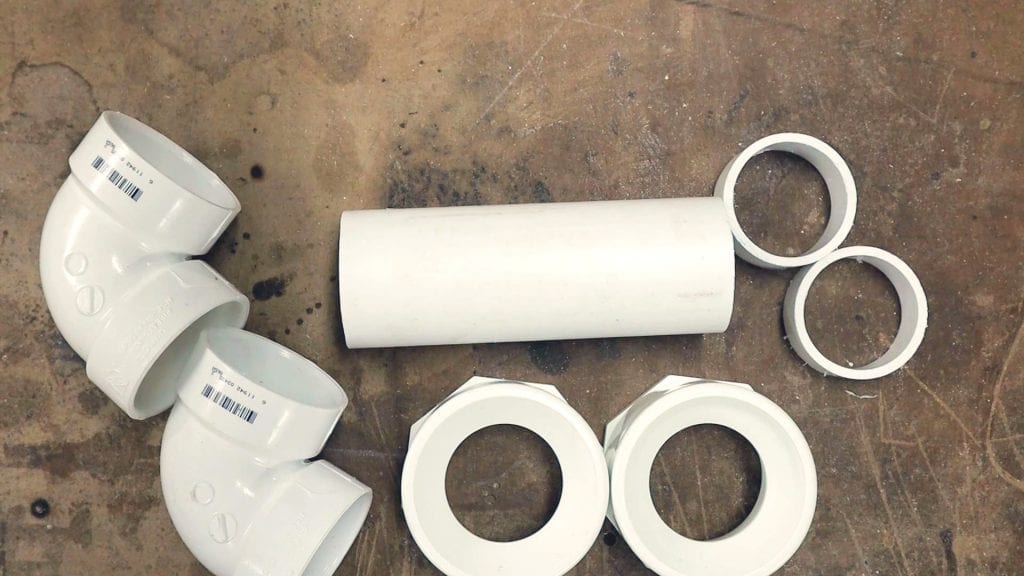
- 2″ PVC Pipe – about 12″ (depending on the width of your device)
- (2) 2″ PVC Elbow / 90-degree Fittings
- (2) 3″-to-2″ PVC Bushing Fittings
- PVC Glue – optional, but recommended
Cut List
The cut list for this project is very simple. You only need to cut three sections of the 2″ PVC pipe:
- 6.5″ length of 2″ PVC pipe – this size will vary depending on the width of your phone. Cut this pipe to 3″ longer than the width of your device.
- (2) 2″ length of 2″ PVC pipe – this will connect the elbows to the bushings
Assembly Steps
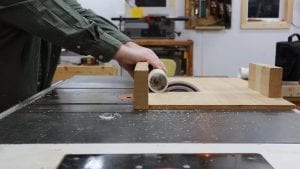 Cut the PVC pipe into the three lengths using a saw. For my phone (iPhone 8 Plus) my cut length was 6.5 inches. Your length may vary based upon the device you are using. Also cut two 2 inch long sections of pipe.
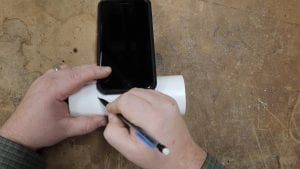 Using your tape measure and pencil, find the center point of the pipe. Using your device, mark the width and length of the cutout. You want as tight of a fit as possible while still leaving some wiggle room.
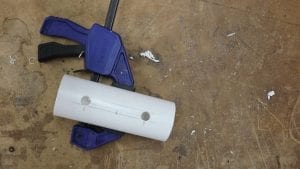 Using your drill and bits, drill small holes on the ends of the slot to cut out. TIP: It’s easier to start with a small bit and work you way up to the large bit rather than trying to drill the large hole at once. For my phone, I ended up drilling a 1/2 inch hole at each end of the slot.
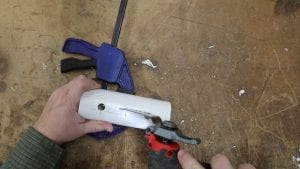 With the holes drilled, the next step is to cut out the remaining waste portion of the pipe to finish the slot. You can cut this with a hand saw, or power saw — whatever you feel comfortable using! I used my Craftsman Oscillating Cutoff Tool and it made quick work of the job.
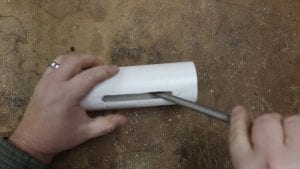 With the slot cut, you will now want to round over and smooth any rough edges or imperfections. You can use a file set, sandpaper, or even a pair of scissors to scrap the edges smooth. This is the benefit of working with PVC!
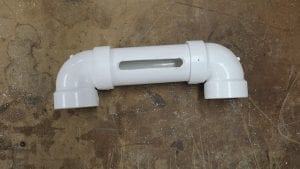 Assembly is a very easy process. Begin with your center pipe, and attach the two 90-degree elbow fittings to each end. Optional: use your PVC glue to affix the pieces permanently to the pipe.
 The next step is to attach (or glue) the short 2 inch sections of pipe to the other ends of the 90 degree eblow fittings. Again, you can choose whether to glue them in place or use a friction fit.
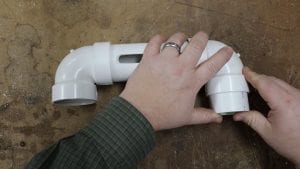
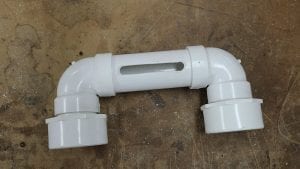 Your final step is to put the bushing adapters/reducers onto the ends of the small 2″ pipes to join the bushings to the elbows. These larger bushings tilt the unit backwards slightly to help project the sound upward and into the room. They also give the acoustic amplifier a nice look!
Rock Out!
Now that your new PVC Acoustic Phone Amplifier is done you can queue up your favorite jams and rock out! Did you know? Amazon Prime includes access to thousands of songs and music for free with a prime membership. Get a FREE 30-day trial of Prime Here!